Hills and Descents With a Dog Trailer: Climbing Smart, Braking Smarter
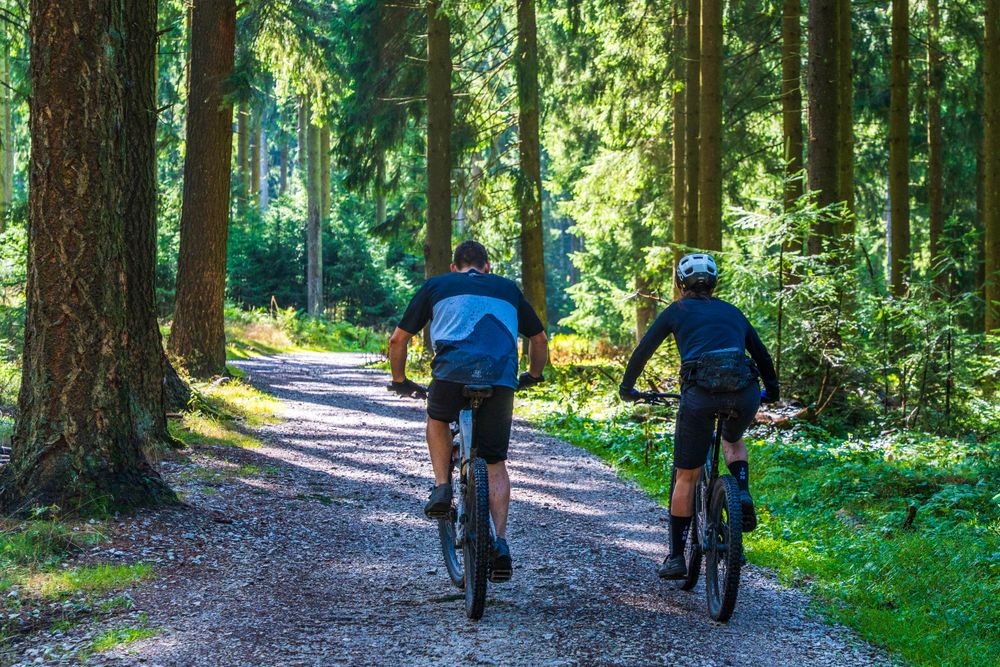
Everyone worries about getting the trailer UP the hill. The skill that actually matters is getting it down — because on descents, the trailer stops being cargo and starts being momentum.
Here’s the main point: with a trailer, the climb is an effort problem and the descent is a safety problem — and most riders have them backwards. Climbs are solved by low gears, seated spinning and the honourable walk-up. Descents demand real technique: early, repeated, both-brake pulses instead of white-knuckle dragging, speed capped at what you can comfortably stop from, and corners taken like you’re driving a small truck. Because you are.
The physics is simple and worth respecting: 15–25 kg of dog-and-trailer barely notices gravity on the flat, leans on you going up, and pushes on the way down — adding momentum your brakes must manage on every slow-down, all descent long. Riders feel this within seconds of their first real downhill and either learn the technique or learn to fear hills. This article teaches the technique.
You’ll get the gradient bands (what percentages actually feel like with a trailer), the seated-climb method, the complete descent doctrine — including the rim-heat problem on long drops — hilly route planning, and what your passenger experiences while you do the work. 🐾
📋 What’s In This Guide
The Physics, In Plain Words
Uphill: the trailer leans on you
Climbing, gravity pulls the trailer backwards down the slope, and that pull arrives at your rear axle as steady resistance — like towing through soft sand that gets softer with every percent of gradient. Nothing dangerous about it; it’s pure effort, rationed by your lowest gear and your patience.
Downhill: the trailer pushes
Descending flips the arrangement. Now gravity accelerates the trailer into you, and every time you brake, your brakes must kill your momentum plus the trailer’s. The push is most obvious in the first second of braking — a firm nudge at the rear as the trailer’s slack takes up — and it grows with speed, load and gradient. This is why descent speed limits with a trailer aren’t about bravery; they’re arithmetic about stopping distance.
The load multiplies everything
A 10 kg terrier setup and a 30 kg shepherd setup are different vehicles on the same hill. Before your first hilly ride, know your all-in towed weight (the weight-limit math) — every band and rule below shifts one notch more conservative for heavy rigs, and one notch more relaxed for feather ones.
“Uphill, the trailer leans on you — that’s just effort. Downhill, it pushes you — that’s the part that deserves technique. Ride descents like you’re driving a small truck, because you are.” ⛰️
Gradient Bands: What % Feels Like
Route apps report gradients as percentages. Here’s the translation with a mid-size trailer and medium dog aboard (heavier rigs: read one band steeper):
| Gradient | Climbing Feels Like | Descending Demands | Verdict |
|---|---|---|---|
| 0–3% | Barely there — a stiff breeze of effort | Normal riding, light speed awareness | 🟢 Everyday terrain |
| 3–6% | Honest work; low gear, steady spin | Pulse braking starts; speed capped consciously | 🟢 Fine with technique |
| 6–9% | Hard; lowest gear, breathing seriously — the walk-up starts calling | Full descent doctrine: slow entry, both brakes, wide corners | 🟡 Experienced + fit |
| 9–12% | Most riders walk (and that’s the smart play) | Serious momentum; many should walk down too | 🟠 Short pitches only |
| 12%+ | Walk it — no shame, all sense | Walk it. Brakes + trailer + 12%+ is a bad equation | 🔴 Not riding terrain with a trailer |
Length matters as much as steepness
A 10% ramp for 50 metres is a sprint and a story. A 6% grade for three kilometres is a project — both up (pacing, water, maybe a mid-climb break) and down (brake heat, covered next). Read elevation profiles, not just maximum gradients, when planning (route guide).
Climbing Technique
Sit, spin, settle in
- Shift early. Drop to your climbing gear before the slope bites — grinding a shift under full load is how chains complain.
- Stay seated. Standing rocks the bike side-to-side, which yanks the hitch and wobbles the whole rig. Seated spinning keeps the pull smooth. If you can’t climb it seated, that’s the walk signal — not a standing invitation.
- Spin, don’t stomp. A fast-turning easy gear beats slow powerful grinding — kinder to knees, chain and hitch alike.
- Pace like it’s long. Climb at conversation-adjacent breathing. Blowing up halfway serves nobody, least of all the passenger who now waits roadside while you see stars.
- The walk-up is a technique, not a failure. Walking a steep pitch with the rig is what experienced trailer riders do without a flicker of shame — often faster than wobble-riding it, always safer, and the dog gets a bonus sniff-walk beside you.
Know your ceiling before you need it
The bike guide’s hill test — can you climb your steepest regular hill seated, loaded, spinning? — defines your riding ceiling. Everything steeper is walking terrain until your gearing or fitness changes. Chronic ceiling problems have three fixes: flatter routes, a wider-range cassette, or the e-bike路 — sorry, the e-bike route.
The Descent Doctrine
The five rules
- Enter slow. The speed you start a descent at is the speed you’ll be managing all the way down — momentum compounds; start with less of it. Crest the hill, brake to a modest pace before gravity engages, then hold it.
- Cap speed at your stopping distance. The honest question every few seconds: could I comfortably stop for a dog walker appearing at that bend? If not, you’re going too fast for the road you can see. With a trailer, that cap sits well below your solo pace — typically walking-plus-a-bit on technical descents, brisk-but-sane on open ones.
- Pulse, don’t drag. Brake firmly for a second or two, release, let the bike run, brake again — instead of dragging the brakes continuously. Pulsing keeps brakes cool (next section), keeps your hands fresh, and each firm pulse controls better than a long weak squeeze.
- Both brakes, front biased. The front brake does most stopping work; the rear steadies the rig. Rear-only dragging (the nervous habit) overheats one brake, stops poorly, and can skid; front-plus-rear together, applied smoothly while upright, is the way.
- Brake before corners, never in them. All slowing happens on the straight approach; through the corner you’re off the brakes, wide line, upright as possible, letting the trailer track through behind you. Braking mid-corner with a trailer is how the rig gets out of shape.
Dragging vs pulsing, side by side
| 😬 Dragging (the instinct) | ✅ Pulsing (the technique) | |
|---|---|---|
| How it looks | Brakes squeezed lightly, continuously, all the way down | Firm 1–2 second squeezes, full releases between |
| Brake heat | Builds constantly — no cooling gaps | Sheds between pulses — stays in range on long drops |
| Stopping authority | Fades as heat builds — weakest when needed most | Each pulse arrives on cool, full-strength brakes |
| Hand fatigue | Constant grip — aching fingers by halfway | Work-rest cycles — fresh hands to the bottom |
| Trailer behaviour | Constant light push-pull at the hitch | Predictable nudge per pulse, settled runs between |
| Cabin experience | Endless mild surging — the bracing dog | Smooth runs with brief slowdowns — the napping dog |
Surface changes the math
Gravel, wet leaves and washboard halve your braking grip and double your caution: slower entry, gentler pulses, and the trail guide’s line-choice craft. Wet tarmac adds the rain rules — everything earlier, everything gentler.
The dignity clause
Any descent that makes your hands ache, your heart pound or your brakes smell is a descent to walk next time. Walking down is data-driven humility — the rig is heavy, the bend is blind, the surface is loose — and it costs four minutes. The alternative failure modes cost more.
Brake Heat: The Long-Descent Problem
Why long drops cook brakes
Braking converts speed into heat, and a trailer means more speed-energy to convert. On a long continuous descent, dragged brakes never get a cooling gap: rim brakes heat the wheel rim itself (risking, in extremes, tube failure — the old touring-cyclist blowout), and disc brakes fade as pads and fluid overheat. The trailer doesn’t create the problem — it accelerates it.
The management, stacked
- Pulse braking — the doctrine’s rule 3 exists mostly for this: release gaps are cooling gaps.
- Slower overall — less speed to repeatedly kill means less total heat. The rig that enters slow brakes less, full stop.
- Break the descent — on a multi-kilometre drop, stop once or twice in shade: brakes cool, hands recover, dog gets water and a look at the view. A “descent break” sounds absurd until the first time you smell hot brake.
- Hardware honesty — fresh pads before hill trips, discs preferred for hilly homes (bigger rotors run cooler), rims checked for wear if you’re on rim brakes (the bike guide’s brake section is the prerequisite reading).
A sharp hot-metal or burning smell mid-descent means brakes at their limit. Stop at the next safe spot, in shade, and wait ten minutes — don’t test what’s left in them, and don’t touch rims or rotors (they burn skin). Resume slower, pulse harder, or walk the rest. Brakes recover fully when cooled; ridden past their limit, they may not give you the courtesy of warning twice.
What Your Dog Experiences
The tilt is fine; the slide isn’t
Cabin angle on climbs and descents is milder than it looks from the saddle — trailers tilt less than the road because of hitch geometry. Dogs handle the tilt easily; what bothers them is sliding on a slick floor as the angle shifts. The fix is the same grippy layered floor the mods guide installs — plus a bolster at the front wall for long descents, where their weight settles forward.
Climbs are slow-cooker sun exposure
The climb’s hidden dog-issue: you’re slow, so shade passes slowly — a 20-minute grind up an exposed slope is 20 minutes of sun on the cabin. Hot-day hill routes want their climbs shaded or early (the heat bands own the veto), and water stops at the top are non-negotiable — for both of you; you’ve earned it differently.
Descents are the smoothness test
Done right — steady speed, pulsed braking, wide corners — descents are a breeze in the cabin, literally. Done badly — grab-brake, jerk, grab — they’re a series of shoves your passenger feels double. If your dog braces or stands on descents, the ride is telling on your braking: smooth it out and they lie back down. A camera or mirror (mods guide) makes the feedback loop instant.
Planning Hilly Routes
- Read the elevation profile, not the distance. 20 hilly kilometres out-work 35 flat ones. Route apps show total climb and gradient colouring — learn your app’s (route guide).
- Climb early, descend fresh. Put big climbs in the ride’s first half — climbing tired is misery, but descending tired (soft hands, slow reactions) is the actual risk.
- Prefer climbing the steep side, descending the gentle side of any loop — walking up 12% is fine; riding down it with a trailer isn’t.
- Check descent traffic. A gorgeous switchback descent on a road with impatient drivers is no place for a wide, slow rig. Quiet-lane descents or none.
- Budget hills into the day’s cycle math — a big-climb day is a shorter day, with the summit as the long break.
- Remote hills = full kit: the first aid kit, tools, layers and phone matter more where the walk-out is long.
The E-Bike Asterisk
The e-bike deletes the climbing problem so completely that hilly-country trailer life often requires one. But hear the asterisk clearly: the motor doesn’t brake. Descending, an e-bike is just a heavier bike — more momentum, same doctrine, arguably more need for it. E-bike hill riders get the climbs free and should spend the savings on descent discipline: the pulse braking, the speed caps, and (a genuine e-bike advantage) many models’ larger rotors and stronger brakes, which exist for exactly this math.
Recommended Hill Kit
Upgraded Brake Pads (Sintered / All-Weather)
Hill riding is brake riding. Sintered (metallic) disc pads and premium rim compounds handle heat and repeated hard pulses far better than budget pads — the cheapest meaningful upgrade for anyone towing in lumpy country.
- ✅ Resists fade on long pulsed descents — exactly the trailer use-case
- ✅ Wet-weather bite transforms rim brakes in the hills
- ✅ Fresh pads before any hill trip is the standing rule
- ✅ Carry the old set as spares on remote tours
- ⚠️ Bed new pads in with gentle stops before the first real descent
Opens Amazon.com in a new tab. Check current price, size and availability there.
Wide-Range Cassette Upgrade
If the seated hill test keeps failing, buy a lower gear: a wider-range cassette (bigger largest sprocket) turns grind-or-walk climbs into slow, seated, sustainable spins — the classic touring fix, perfect for towing.
- ✅ The difference between walking every hill and spinning up most
- ✅ Kinder to knees, chain and hitch than grinding
- ✅ Standard upgrade path from the bike guide’s hill test
- ✅ Costs a fraction of the e-bike alternative
- ⚠️ Compatibility matters (speeds, derailleur reach) — confirm with your shop before buying
Opens Amazon.com in a new tab. Check current price, size and availability there.
GPS Bike Computer (Gradient & Elevation)
Live gradient and elevation-to-go turn hills from surprises into plans: pace the climb knowing how much remains, and treat the gradient readout as your walk/ride/brake advisor.
- ✅ “3 km of 5% remaining” is pacing gold on long climbs
- ✅ Live gradient calibrates your personal bands fast
- ✅ Logs every route’s true profile for the route library
- ✅ Speed display keeps descent caps honest
- ⚠️ A phone + mount does 80% of this — the computer earns its place on battery and glanceability
Opens Amazon.com in a new tab. Check current price, size and availability there.
Ergonomic Grips / Gel Bar Tape
Descent control lives in your hands, and aching hands pulse badly. Ergonomic grips or gel tape cut the vibration and pressure that fatigue fingers on long braking days — comfort that’s actually control.
- ✅ Fresh fingers pulse cleanly — hand fatigue is a braking problem in disguise
- ✅ Wing-shaped grips spread pressure on long climbs too
- ✅ Pairs with the soft-hands habit every towing skill shares
- ✅ Cheap, transformative on any bike that buzzes
- ⚠️ Set brake levers so wrists stay straight — angle causes more ache than vibration does
Opens Amazon.com in a new tab. Check current price, size and availability there.
Common Mistakes (and How to Fix Them)
Mistake 1: Fearing the climb, winging the descent
The effort problem gets all the planning; the safety problem gets none.
Fix: flip the respect — walk-ups are fine, descent doctrine is mandatory.
Mistake 2: Entering descents at cruising speed
Momentum compounds; you spend the whole hill fighting what you brought to it.
Fix: brake to modest speed before gravity engages, then hold.
Mistake 3: Dragging the rear brake all the way down
One overheating brake, poor stopping, skid risk — the nervous habit trifecta.
Fix: both brakes, front-biased, firm pulses with cooling gaps.
Mistake 4: Standing climbs “for power”
Side-to-side rocking yanks the hitch and wobbles the rig.
Fix: seated spinning to your ceiling; walking above it.
Mistake 5: Braking mid-corner
The rig gets out of shape exactly where there’s least room for it.
Fix: all slowing on the straight approach; corners ridden off the brakes, wide and upright.
Mistake 6: Ignoring the hot-brake smell
The one warning brakes give, ridden through.
Fix: stop, shade, ten minutes, resume slower — or walk. Always answer the smell.
Frequently Asked Questions
How steep is too steep for a dog trailer?
For most riders and mid-size rigs: climb seated up to ~6–9% depending on fitness and gearing, walk up anything steeper, and don’t ride down grades much past ~10–12% — walking down steep pitches is standard trailer practice, not defeat. Length matters too: a long 6% descent demands more brake management than a short 10% ramp. Heavier dogs shift every threshold one notch more conservative.
How do I brake downhill with a trailer?
The doctrine: enter slow (brake before gravity engages), cap speed at your comfortable stopping distance, use both brakes with front bias, and pulse — firm squeeze, release, repeat — instead of continuous dragging, which overheats brakes on long drops. Do all slowing on straights; corners are ridden off the brakes, wide and upright. Expect the trailer’s push in the first second of every brake application — it’s physics, and pulsing manages it cleanly.
Why do my brakes smell going downhill with the trailer?
That hot-metal smell is brake material at its heat limit — the trailer’s extra momentum, converted to heat faster than dragging brakes can shed it. Stop at the next safe spot and rest them ten minutes in shade (don’t touch rims or rotors — they burn). Prevent it with the pulse technique (release gaps are cooling gaps), slower overall descent speed, a mid-descent break on long drops, and heat-hardy pads — sintered discs for hilly homes.
Is it bad for my dog when the trailer tilts on hills?
The tilt itself, no — hitch geometry keeps cabin angles milder than the road’s, and dogs adjust easily. What bothers them is sliding: a slick floor plus changing angles means scrabbling. Fix it with a grippy layered floor and a bolster at the front wall for descents. If your dog stands or braces downhill, read it as feedback on your braking smoothness — pulsed, gradual braking almost always lies them back down.
Does an e-bike solve hills with a trailer?
Half of them — the up half. Motor assist makes climbs genuinely trivial, which is why hilly-country trailer life so often goes electric. But motors don’t brake: descending, an e-bike is simply a heavier bike with more momentum, needing the same doctrine (slow entry, pulsed both-brake technique, capped speed) — arguably more diligently. The good news: e-bikes typically ship with stronger brakes and bigger rotors for exactly this reason.
Hill-Day Checklist
✅ Before Hill Country
- ☐ Brakes fresh: pads checked, levers firm, test-stopped loaded
- ☐ Hill test passed for the planned climbs — or walk-ups planned
- ☐ All-in towed weight known; bands adjusted for the load
- ☐ Route profile read: climbs early, descents on the gentle side, traffic checked
- ☐ Grippy floor + front bolster in the cabin
- ☐ Remote hills: first aid, tools, layers, charged phone
✅ Climbing
- ☐ Shifted early; seated; spinning
- ☐ Paced at sustainable breathing
- ☐ Walked without shame past the ceiling
- ☐ Shade/water for the passenger on slow exposed grinds
- ☐ Summit = proper break: water, view, brake-hands rest
✅ Descending
- ☐ Entered slow; speed capped at stopping distance
- ☐ Pulsing both brakes, front-biased — never dragging
- ☐ Corners: braked before, ridden off the brakes, wide
- ☐ Long drops: mid-descent cooling break taken
- ☐ Hot-brake smell answered immediately, every time
- ☐ Too steep, too blind, too loose → walked, cheerfully
Final Thoughts
Hills are where trailer riding grows up: the flat-path habits meet gravity, and technique replaces enthusiasm. The happy news is how learnable it all is — one afternoon of practising pulse braking on a familiar slope, one honest hill test, one walked pitch without shame, and lumpy country opens to you and your passenger for good.
Climb seated, descend like a small truck, answer the brake smell, and put the summit break where the view is. The dogs, for the record, grade hills entirely by that last item — and by their scoring, every well-ridden hill day is a triumph. ⛰️🐾
Confirm the machine first with the tow-ready bike guide and the load math in weight limits. Rough-surface hills add the trail craft, hilly heat adds the temperature bands, and if the climbs still win, the e-bike guide awaits — descent doctrine included.